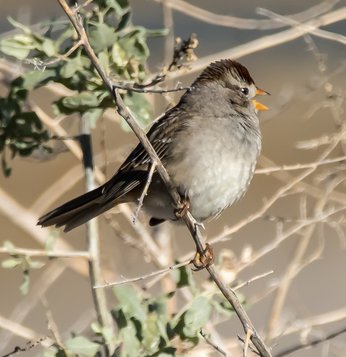
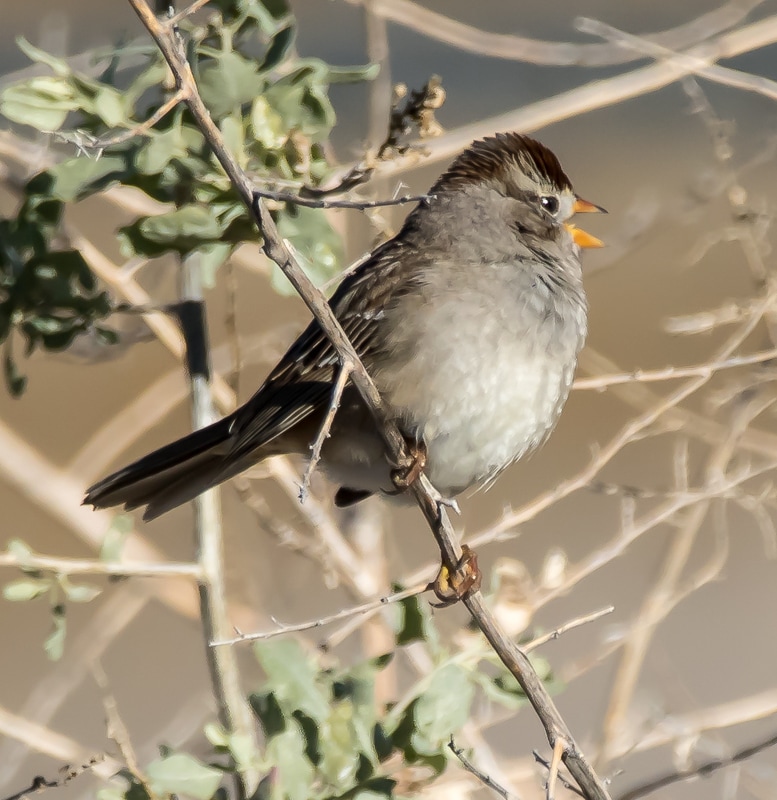
 The past year this blog has focused on Mt. Lemmon and various birding trips around Arizona and Oregon, with an emphasis on the birds and the locations. For a break, I am going to show what can be done with one photo, which like most of my photos (and I suspect most of yours) is good, but not great. The final image after processing is to the right, a white crowned sparrow, likely a juvenile, captured at Sweetwater Wetlands here in Tucson on January 25th. Don't strain to see this larger at this point, a bigger image will appear at the end of the post. This post will appeal to bird photographers who do post-production processing with Adobe Photoshop Lightroom, but is relevant to anyone capturing images and manipulating them to make them better. For bird photography I either handhold or use a tripod with a gimbal head. Although everyone raves about how smooth the gimball heads are, and what great photos you get, the rig is heavy, and when birding with a group the tripod legs get in everyone's way. So, I usually handhold with the help of a stock (stay tuned, a post on my gear is in the planning phase). My birding buddies seem more sociable when I am not swinging a tripod left and right, accompanied by grunting and groaning, plus handholding gives me more mobility, especially important when walking with a group at a reasonable pace. The problem with handholding is that, well, you are handholding, and even with image stabilization there is camera shake. Chances you are also handholding, and like me, are using the best equipment available within a budget. For me it is a Sigma 150-600 mm C series (for a nice review of this lens see this link) which weighs in at 5 lbs, combined with a Canon 7D Mark II. Add a Stedi-stock with a strap from Peak Design and the total rig is about 8 lbs. Not light, but think of it as one of those wimpy 8 lb hand weights at the gym, and it suddenly gets lighter! The Sigma 150-600mm is probably sharpest at 500mm, f/8, but for those small birds in the distance, I run it at 600 mm and wide open, which is f/6.3. I try for shutter speeds in the 1/500th to 1/1000th range, although I can hold pretty steady down to 1/300th. So, with the shutter speed and f-stop fixed, I let the ISO float, or run it at 400 to 1200 depending on the light. For early morning birding, in the shade, the ISO climbs up. So, as always, practice is not the same as ideal. If I get a good shot at a bird, I take it, regardless of distance or light. This means that the following is common:
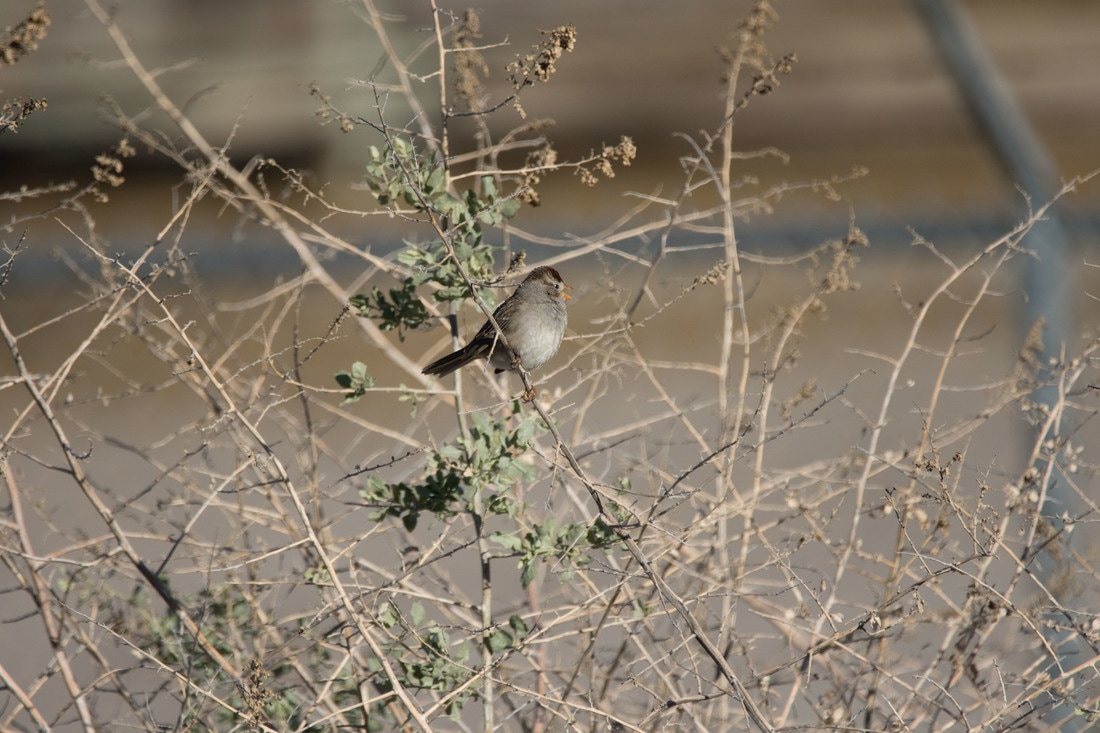
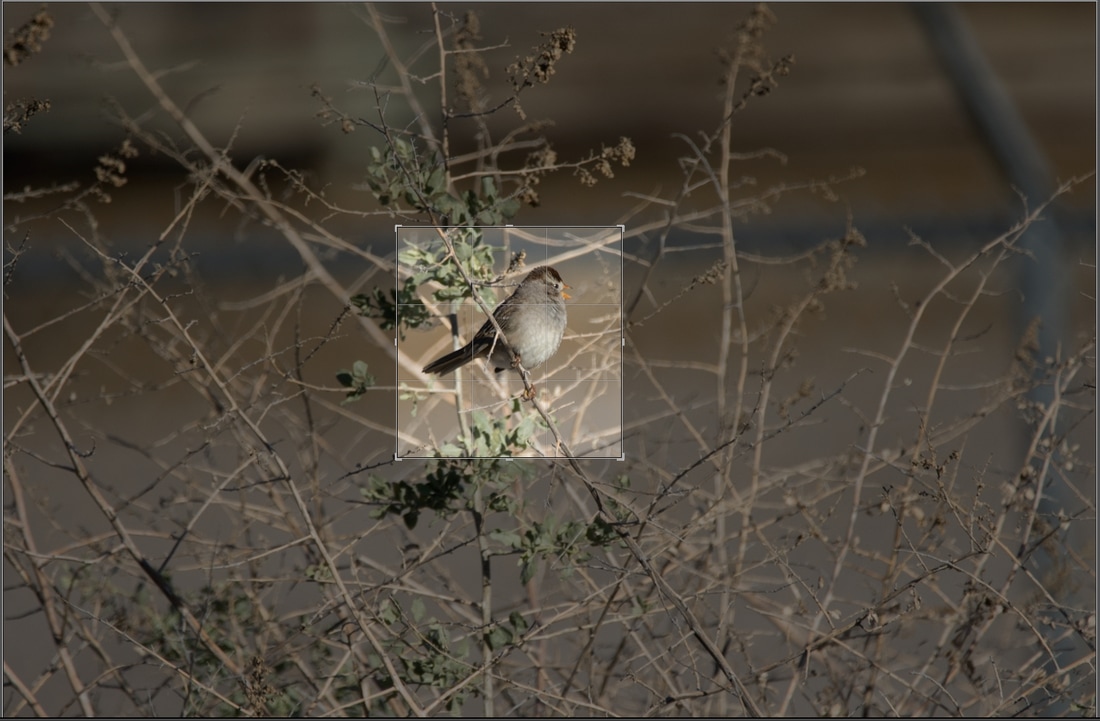
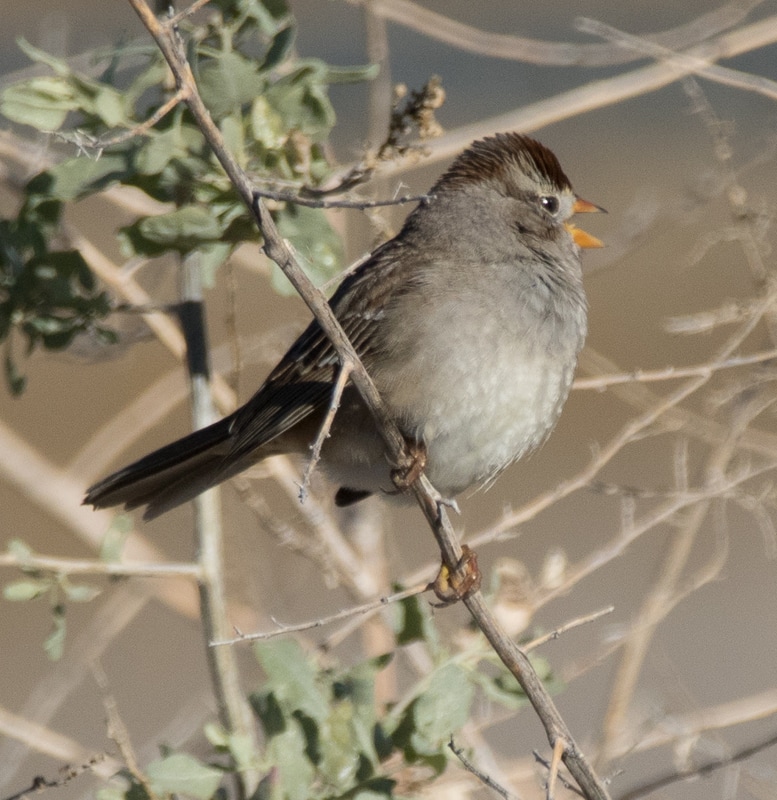
While birding this past Wednesday with Luke Safford and the Audubon crew at Sweetwater Wetlands, I took a series of images of a White-crowned Sparrow. I like the one below because he is vocalizing, making the image more than just another bird-on-a-stick. This was shot with a Canon 7D Mark II, Sigma 150-600 C, at 600mm, f/6.3, 1/2500. The bird is well lit, and had I been more "ISO aware" I could have moved the ISO down and still been able to work in a good shutter speed range. I shoot in RAW at the highest resolution. After importing to Lightroom, this image was 22.8 megs. I use Adobe Photoshop Lightroom CC (same as Lightroom 6), and squeeze everything I can out of the program. I am a big fan of Scott Kelby and his many Lightroom books, and his video courses. Much of my workflow is derived from his courses and books. Once I had picked this image for more processing, I moved from the Library to the Develop mode (tabs upper right), and then to cropping. The screenshot below shows how much (or little) of the frame I decided to save. The background is really not that interesting, so placing the bird at a corner to highlight a flower or clump of berries was not an option. The image below is my final crop choice, without any other editing The image has a certain soft quality to it, is a bit flat, and some noise in the background. Here a lower ISO would have helped, especially considering the degree of enlargement I have imposed. This is not a Lightroom tutorial, so I am going to list (rather than show) what I did, although I think any Lightroom user could adapt these changes. All changes done with the modules and sliders in the right panel in the Develop mode.
That's it! The final image is below. The combination of noise reduction with masked sharpening creates an effect similar to that of an oil painting. Artists have the advantage of being able to create perfectly smooth backgrounds while selectively sharpening edges. In this case, I was able to take a slightly dull, not so sharp and somewhat noisy (grainy) over-cropped image and modify it into a not unpleasant image, suitable for a small print or a greeting card. This might be just the trick for that less than perfect image of that oh-so-rare bird which you desperately want to print and send to friends!
1 Comment
Leave a Reply. |
AuthorHenry Johnson, photographer and author of this site. For more detail, see About
Categories
All
Archives
July 2024
|
 RSS Feed